Screw-on filters for your digital camera can take your images to another level.
By Jac Kritzinger
The advancements in image manipulation software have made many fit-on camera lens filters obsolete. Some, however, are still essential for travel photographers, their effects unequalled in post-production. Here’s a quick guide to these vital filters, and how to use them.
The basics
Screw-on filters are available for any size and type of interchangeable lens. Your lens is only as good as the filter you’re fitting, so don’t cheap out. Always buy the best optical quality you can afford, and keep them in their supplied cases to prevent nicks and scratches. Also be sure to carry a few rubber bands with your travel kit – sometimes filters become stuck and difficult to unscrew. A rubber band around the rim should give you a better grip, and do the trick in most cases. Which are the most useful filters for digital photography?
Circular polarising filter
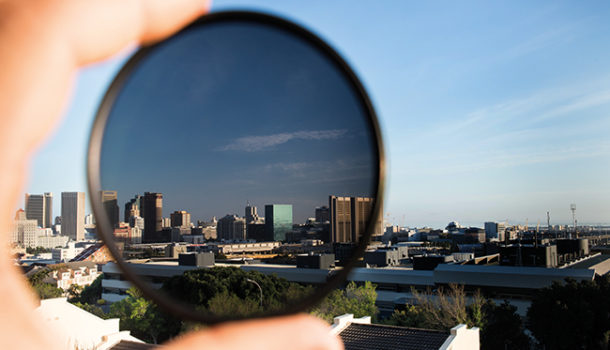
The mighty polariser is the outdoor photographer’s best friend. It increases contrast and saturation, giving your images a richer colour range, no matter what time of day you’re shooting. Blue skies and green foliage pop out, and contrast between light and dark areas is increased. It also cuts out reflections from shiny surfaces such as glass or water, removing distracting elements and glare. The outer ring of the filter can be turned to increase or decrease the effect. The maximum polarising effect is achieved when the sun is at a right angle to the front of the lens, be it from the side or from above. Shooting with the light directly behind or in front of you will have no effect. Remember that a polariser is made of dark glass that ‘steals’ a lot of light, so adjust your ISO and shutter speed to compensate. Indoors or on a cloudy day it will have no effect, except to darken your image, so remember to only use this nifty piece of glass outdoors in sunny weather.
Neutral density filter
A neutral density filter (or ND) is a disc of darkened glass used to block out light, available in different strengths, ranging from 1 to 3 stops. This light-blocking effect is essential when trying to add a sense of movement or motion blur to images in overly bright conditions. For instance, let’s say you arrive at a waterfall in the middle of a bright summer’s day. You would like to show some sense of motion blur in the water to capture the atmosphere by slowing down the shutter speed. Your ISO is set at its lowest and your aperture at its highest – due to the bright conditions – but you still can’t get the shutter speed down low enough to achieve a motion-blur effect in the water without overexposing the image. That’s where the humble ND steps in. By effectively blocking a considerable amount of light from the lens, it gives you the option of correct exposure with a slow shutter speed (and its motion effects), regardless of the time of day and brightness of the scene. Given that slow shutter speeds and NDs go together, make sure to have a tripod or another form of camera support close by.
Neutral density graduated filter
A neutral density graduated filter (or ND grad) is a specialised piece of equipment, and a must if you’re serious about your landscape photography. It balances out exposure between earth and sky, in order to retain maximum detail and definition in both. These filter sets consist of a rectangular holder that fits on the front of the lens, with a darkened slide of glass that can shift up or down in said fitting. By moving the darkened slide up or down, you can expose correctly for the bottom half of your image, below the horizon – the darkened area then reduces the intake of light from the sky, above the horizon, to keep it from being over-exposed and detail in the sky being lost. ND grads are therefore especially useful when brightness between the foreground and sky varies greatly when setting up a landscape frame. They also make long exposures possible in most conditions, without the sky turning into a mass of burnt-out highlights. As is the case with a regular ND, a tripod and ND grad go hand in hand.
Ultraviolet filter
An ultraviolet filter (or UV) offers none of the creative effects above. A clear disc of glass that was used in film days to correct UV glare (digital cameras do this automatically), it’s used today to protect the front element of the lens, with no notable optical effect. Think of it as a see-through lens cap – if you’re sporting expensive glass, it’s a good idea to have one fitted permanently. UVs are cheap; after having absorbed a few nicks and scratches that could have damaged your lens, simply replace it with a new one.
Lightweight and easy to travel with, filters can make a huge difference to your photography. Get out there and have fun, and remember that practice makes perfect!
Photography Jac Kritzinger
(This article was first published in the spring 2015/16 issue of AA traveller magazine)


