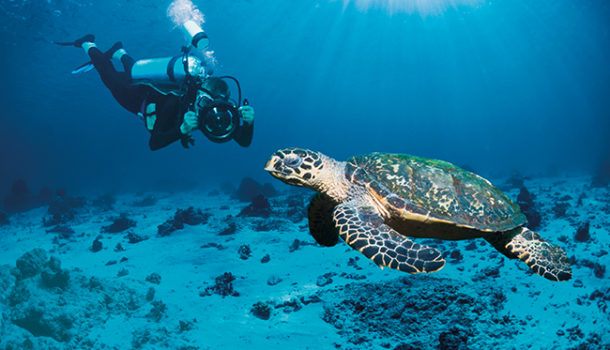
Paying special attention to these key issues will take your underwater photography to new depths. By Jac Kritzinger
Attempting to capture the magical world that lies beneath an ocean or lake’s surface can yield really spectacular results. But it can also be extremely challenging, no matter your photographic skill level as a landlubber. Here are some tips to get you started. Go on, take the plunge!
Housing hunt
Your first priority before submerging should be to ensure your gear will be kept dry and working properly. DSLRs perform better than compact cameras and action-cams underwater, given the flexibility in lens options and possible settings – not to mention the superior image quality. Plastic or aluminium underwater housings are available for most current DSLRs (and flashguns). But higher end models can be pricey, so renting gear may be your best bet when starting out.
Whichever way you go, test your equipment safely on dry land with the housing fitted before you venture out on to the water.
Glass selection
There’s no changing lenses underwater, so make sure you’ve got the right one fitted when you set out. A wide-angle zoom (with a range of about 18–70 mm) with macro capabilities is generally best. Telephotos, being made to capture things from a bit of a distance, can’t see properly through the density of water in the way. At the wide end of things, the right lens will allow you to capture broad vistas, while zooming in with macro should be spot-on for capturing detail when going in close.
Remove all filters from the camera’s front element, especially light-robbing polarisers, and even UVs (light refracts differently underwater and having any kind of filter fitted can have a dulling effect on your images).
You won’t need fast glass either, as big apertures will further haze out subjects that already appear considerably softer than on land. A medium aperture, ƒ/8 or so, is a good choice to go with.
If your camera (and housing) supports live view and your lens’s autofocus is up to the challenge, it will usually be easier to compose in that mode, as opposed to using the viewfinder.
Exposure is everything
Given low-light conditions and smaller apertures, nailing the correct exposure underwater can be quite tricky indeed. Make sure that your ISO is cranked to its highest acceptable value (but not so high that it affects picture quality) and switch to Manual mode so you have full control over settings. Auto and Priority modes are easily fooled in underwater environments, no matter how good the visibility.
Given all this, your camera flash becomes your best friend when going aquatic. On-camera flash can yield good results if it is used correctly (off-camera underwater strobes are more effective, but very expensive). Expose manually for your shots, then fire your flash at maximum output.
Always tweak the flash strength manually (avoid using TTL metering, which will also be fooled by the alien conditions) and remember to get as close to your subject as you possibly can – underwater, flash doesn’t have the same reach that it has on land.
Not only will a correctly used flash illuminate your subject properly, it will bring out essential colour and texture too. Furthermore, it will add a crucial warming element to your images, going a long way to counteract the flat, cold tones when shooting with only ambient underwater light.
Compose carefully
When underwater, few photographic principles apply in the exacting way they do on land. The flash range is significantly reduced, there is more distortion, white balance goes out the window and, no matter how close you are to your subject, it will always seem further away than when shooting dry.
With marine life, get as close to the action as you (safely) can and aim to work at your subject’s eye level, testing both ends of your zoom. When framing, remember that most on-camera flashes will not have a range of more than two metres, even in good visibility; this will decrease even more the deeper you go.
Your flash will also pick up more plankton and debris at lower depths. Try turning it off and aiming towards the surface for interesting silhouettes. Include your fellow divers for narrative contrast and a sense of scale.
RAW power
Shooting in RAW format will allow you more range when tweaking your images using software later. The exposure can be corrected (unless you’re a histogram honcho, it will be difficult to tell if you’ve exposed correctly just by looking at the camera’s playback screen underwater) and white balance can be altered to reduce the all-too-prevalent cold tones.
Photography istockphoto
(This article was first published in the spring 2015 issue of AA traveller magazine)


